An Acer Aspire 5536 came into the shop today that had cut out whilst performing a Windows update. The laptop was running Windows 7 Ultimate with 4gb of memory. Although the laptop had been carried to the shop the case was very warm. When a processor gets too hot it will shut the computer off.
The main reason that a computer overheats is because the fan is clogged up with dust or the thermal paste which conducts the heat between the central processor and the heat sink has become dry and lost its conductivity of heat. As well as the central processor there is also a graphics processor that can also get too hot.
This article shows you how to take your Acer Aspire 5536, clean it and then re-apply thermal paste.
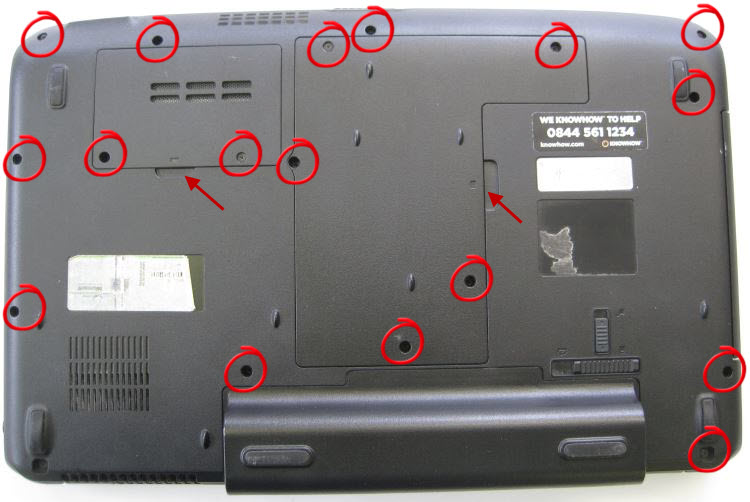
Undo all the screws circled and then prize the two covers away where shown by the arrows
Remove the battery.
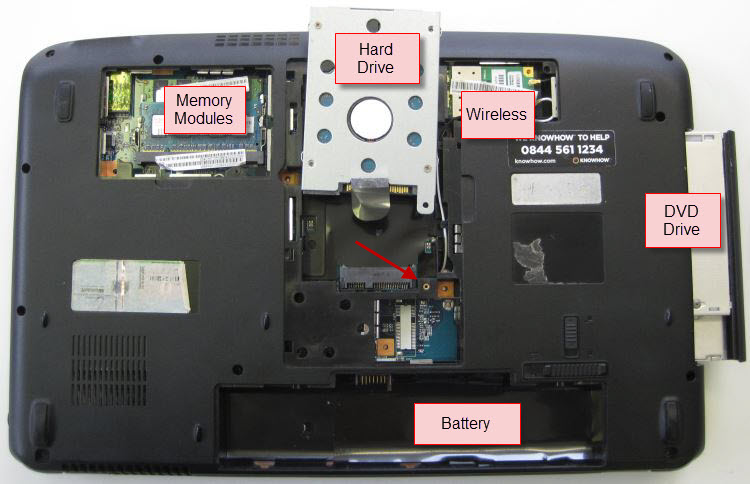
Remove the main components
Remove the main components from the bottom of the laptop. The DVD Drive slides out, the battery comes out using the two slides. The hard drive comes out by undoing the screw which the arrow is pointing at and then slides away from the screw. The wireless card is held in by a small plastic clip to the right of the card on this photo, move the clip to the right and the card will lift up. Then pull the wireless card to the right. Give the black and white wire a small pull and they will un-clip from the wireless card. The memory modules are removed by moving the metal clips either side of the modules away from the module, the module should then flip up and you can remove them.
Note: Always try to handle the memory modules at the edges.
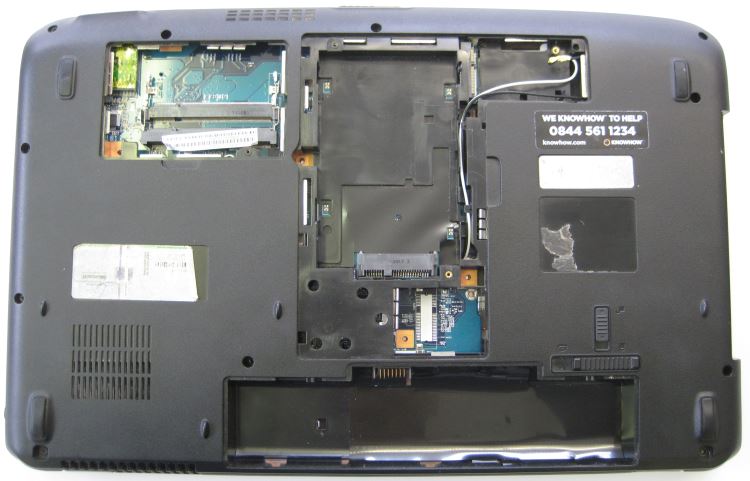
All components removed from laptop
Remove top panel above keyboard
Using a small flat screw driver remove the top panel from above the keyboard. The panel is held in by little clips. I found using a small screw driver in the centre first worked best. Be careful not to break the panel or to flip it up to hard as there is a small ribbon cable underneath.
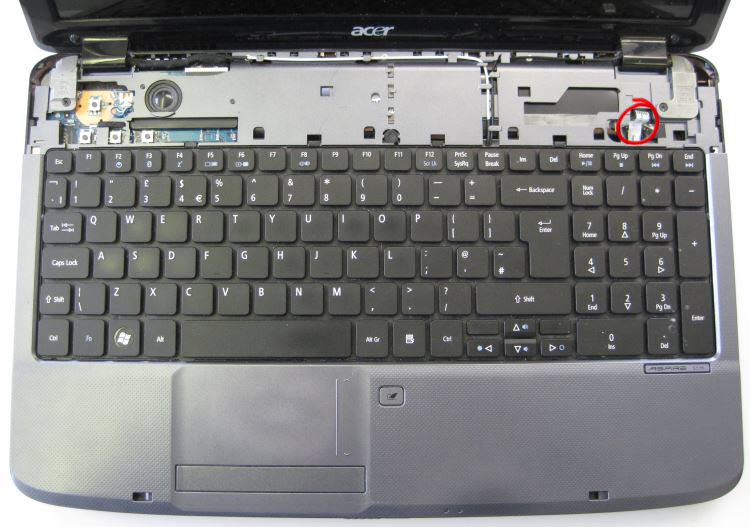
Acer Aspire with top panel above keyboard removed. Note ribbon cable circled, this is attached to the top panel
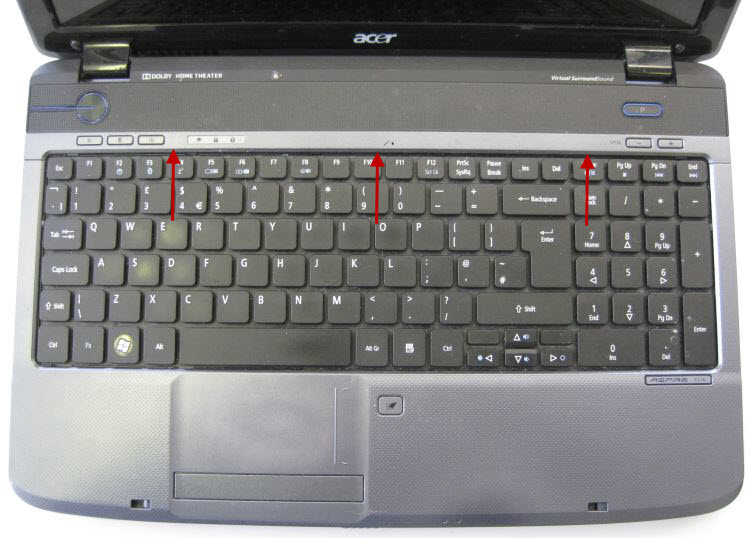
With the top panel removed you will see four clips at the top of the keyboard, using a small screw drive push them upwards. The keyboard will naturally rise as each clip is released. The keyboard is also held in each side, you need to flex the keyboard from the centre so you can lift it out. Again be careful as there is a ribbon connecting the keyboard to the laptop.
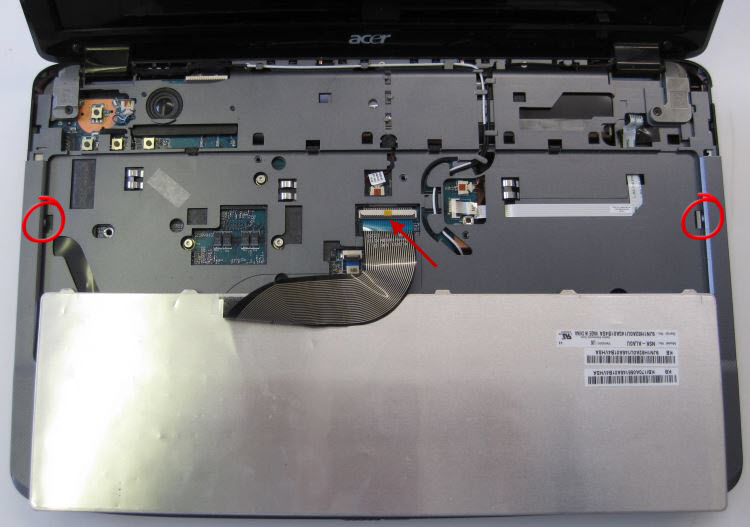
Keyboard retainers circled. Arrow points to connector of keyboard to laptop. The brown clip lifts at the bottom to release the keyboard
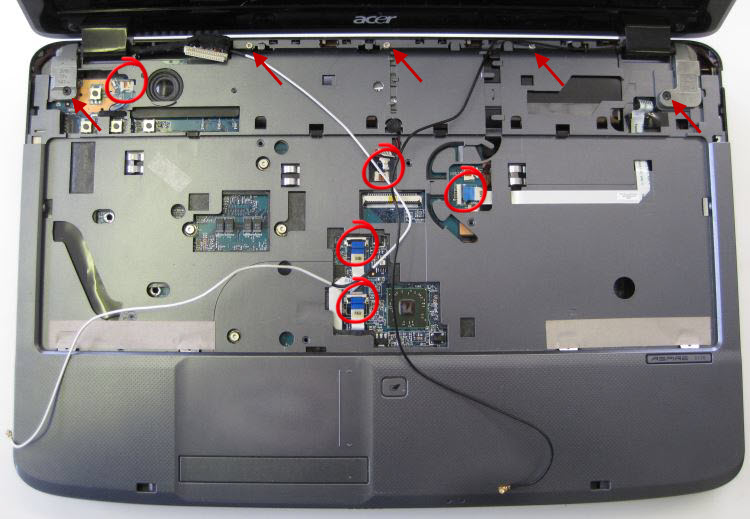
Undo the ribbons and cables circled from the laptop and undo the screws pointed to. The black and white cables need undoing, they used to connect to the wireless card underneath. Then undo the two screws (far left and far right) that hold the screen to the base. Hold onto the screen as you take the two screws out.
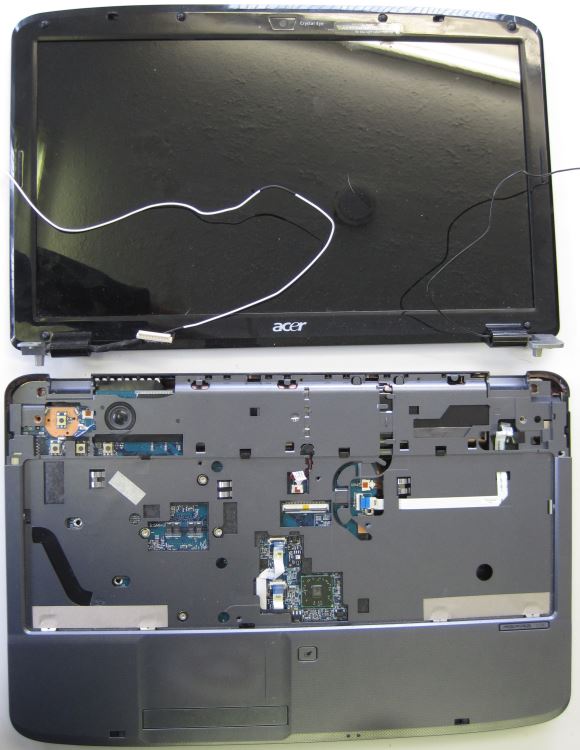
The screen and keyboard are now separate
The top of the base and the bottom should now separate, ideally use a plastic spludger so that the case does not get marked. If a spludger is not available then use a small flat screw driver. I normally start at one of the bottom corners.
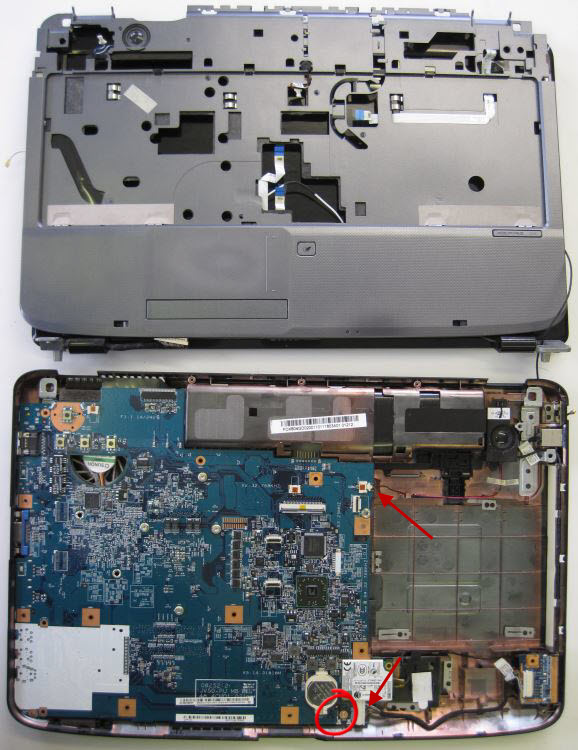
Remove the cables pointed to by the arrows and remove the screw circled
The motherboard should now come out. Lift the motherboard from the right-hand side.
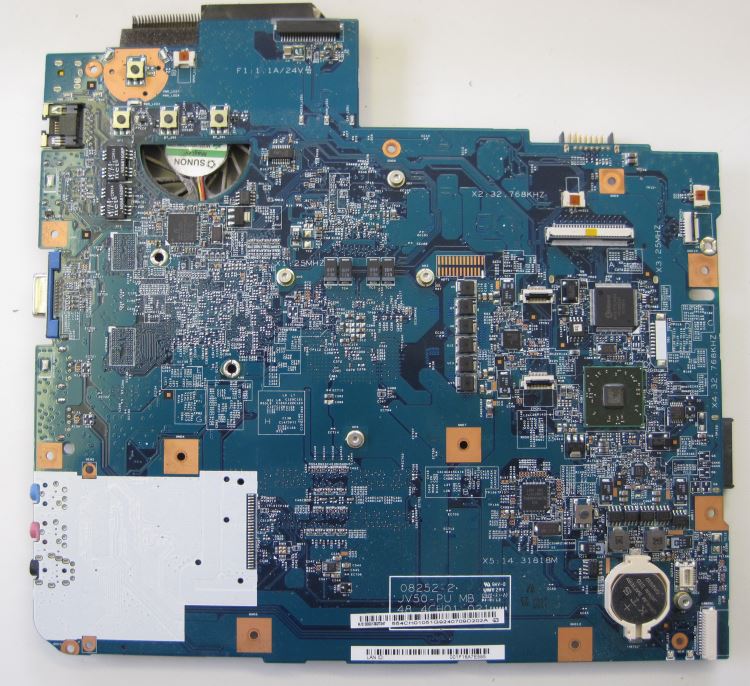
Motherboard removed from the laptop
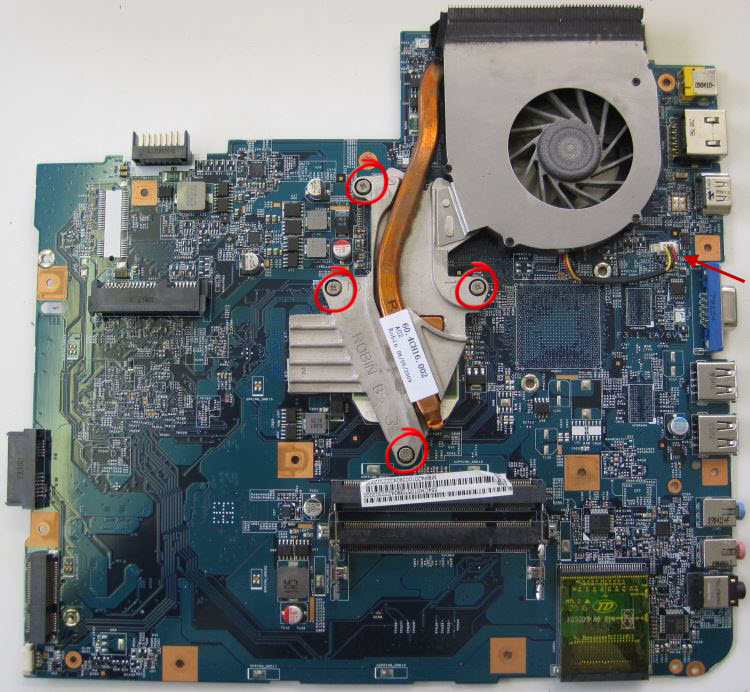
Motherboard from bottom. Pull the wire out that is pointed to and undo the four screws circled
Once all four screws are undone twist the heat sink gently clockwise and anti-clockwise, it should then release from the central processor.
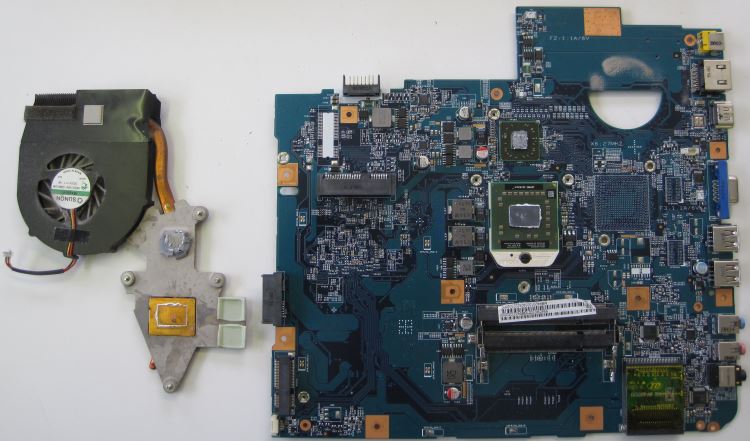
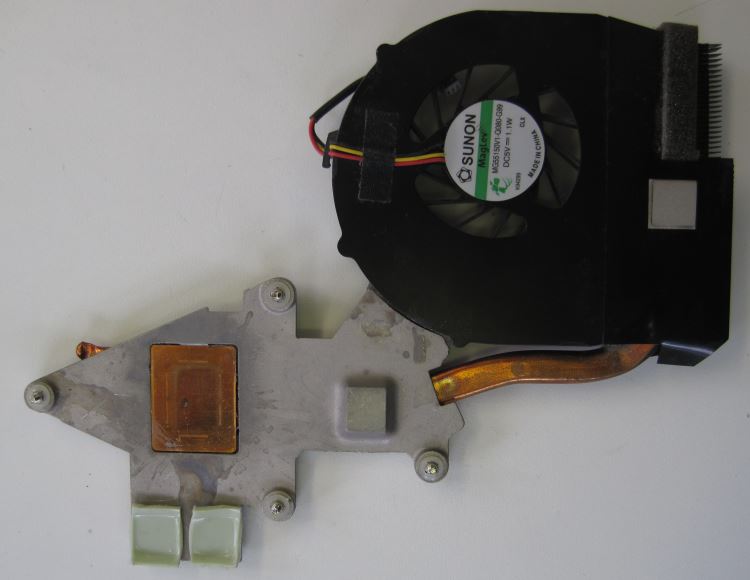
Acer Aspire heatsink and fan removed from motherboard

Acer Aspire heatsink and fan showing dried thermal paste. The smaller block is for the graphics processor and you can see that the thermal paste is not even on the heatsink. Probably why this laptop was overheating.
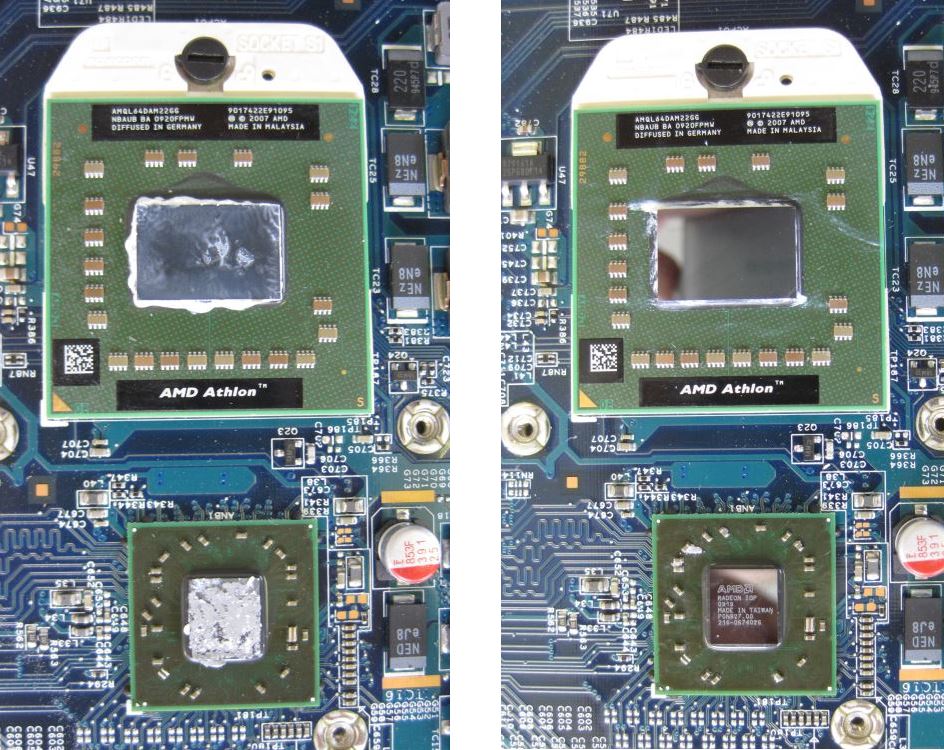
Acer Aspire central processor and graphics processor before and after cleaning
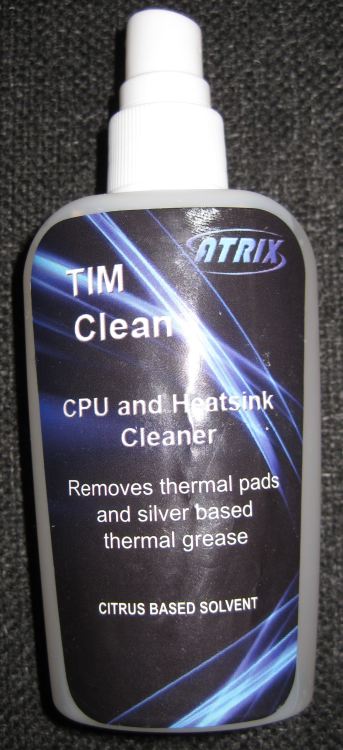
Using a paper towel or lint-free cloth remove the old thermal paste from both processors, you can use a cleaner fluid to help, I use TIM Clean
Acer Aspire heatsink and fan clean
Now that the heatsinks are clean you can apply the thermal paste to the central and graphics processor and reassemble. Make sure you tighten the screws on the heatsink in order and not too tight. Each screw has a number 1 to 4.
I have put all the photos in a zip file for you to freely use. Acer Aspire 5536 Original photos