 In this article I am going to show you how to inspect and remove dust and dirt from inside an Asus K53E laptop. I will also show you haw to remove the DVD drive from the Asus K53E as it is not like other laptops in the fact that the retaining screw is under the keyboard!
This will take less than one hour and is one of the easier laptops to take to pieces 🙂
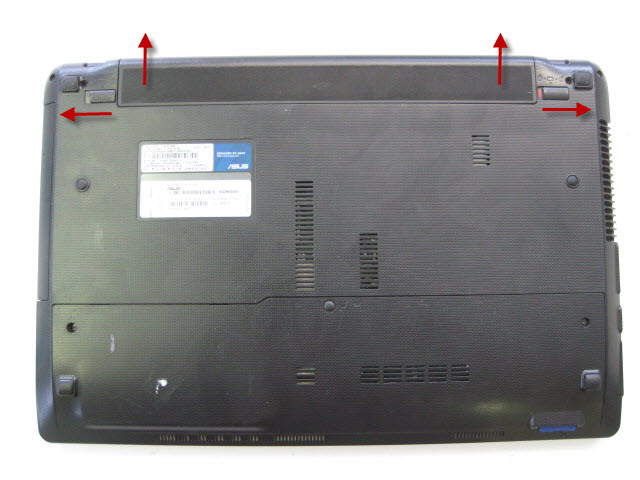
Turn the laptop over and remove the battery

Undo the two screws holding the compartment cover in place.
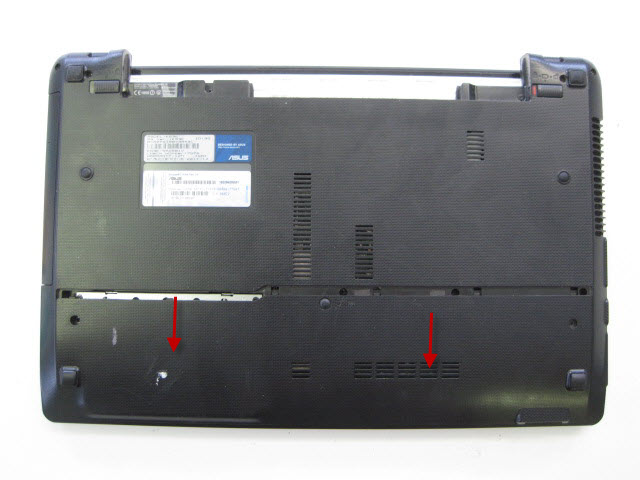
Slide the compartment cover off.
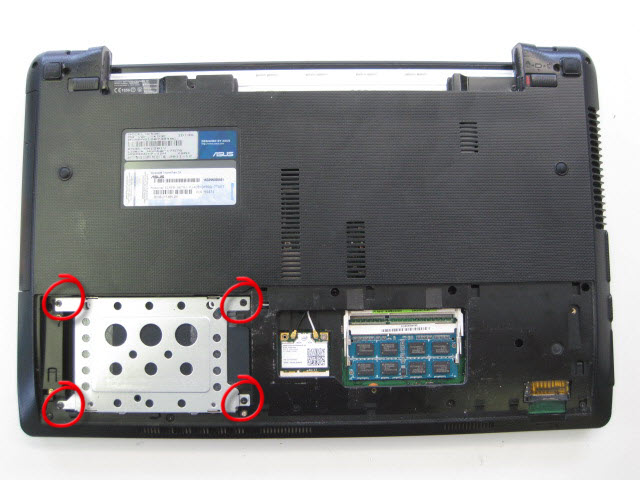
Remove the 4 screws holding the hard drive in place.
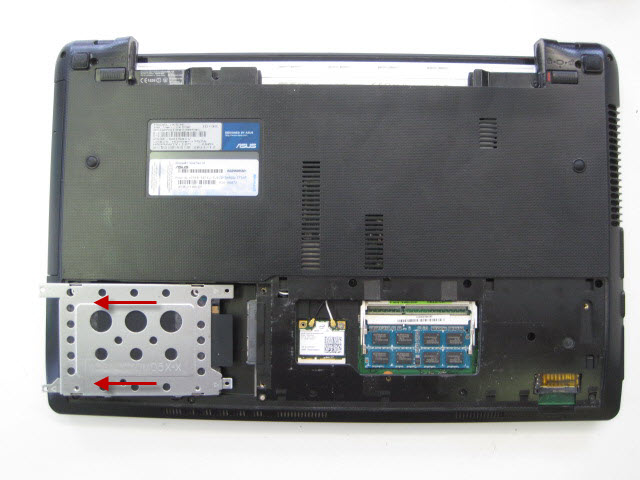
Slide the hard drive out of the laptop.
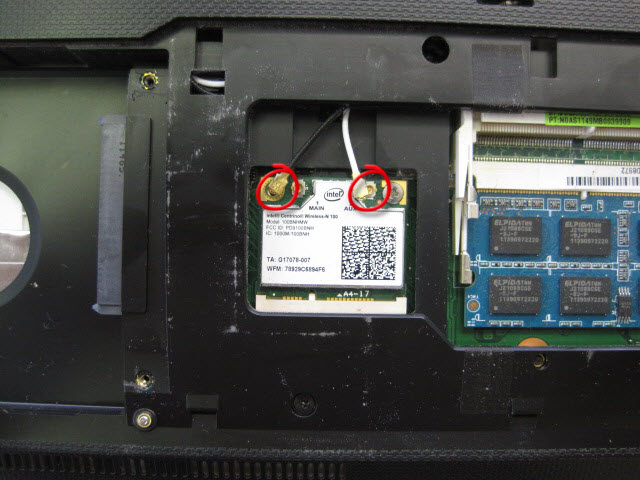
Detach the two cables from the wifi card. These just click into place.
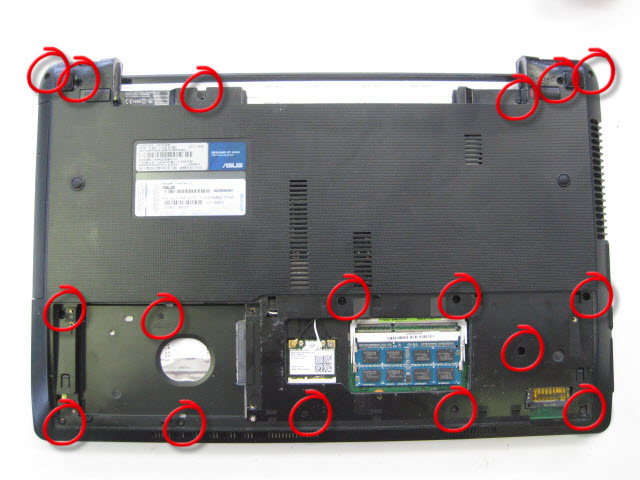
Remove all screws on the underneath of the laptop.
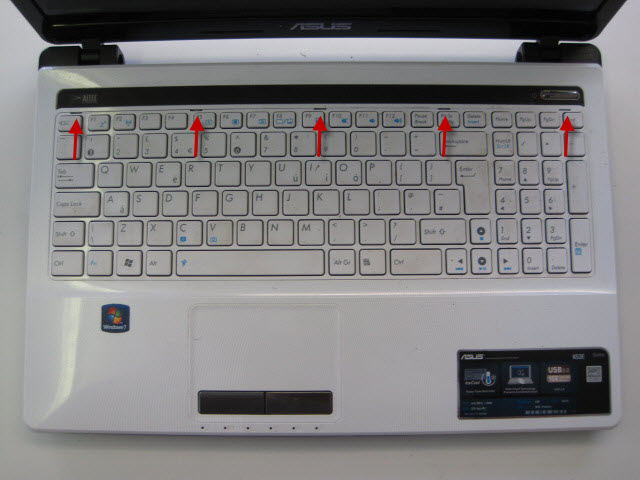
Turn the laptop over and remove the keyboard. The keyboard is held in by 5 retaining clips that need pushing back in the direction shown.
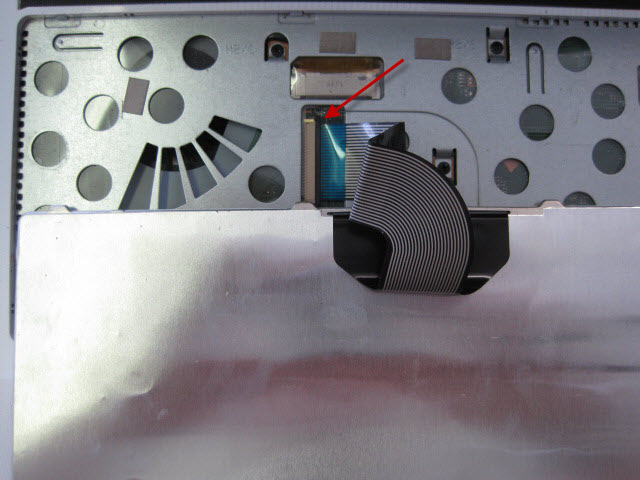
The keyboard is connected using a ribbon. To detach the ribbon from the laptop gently lift the brown retaining clip.
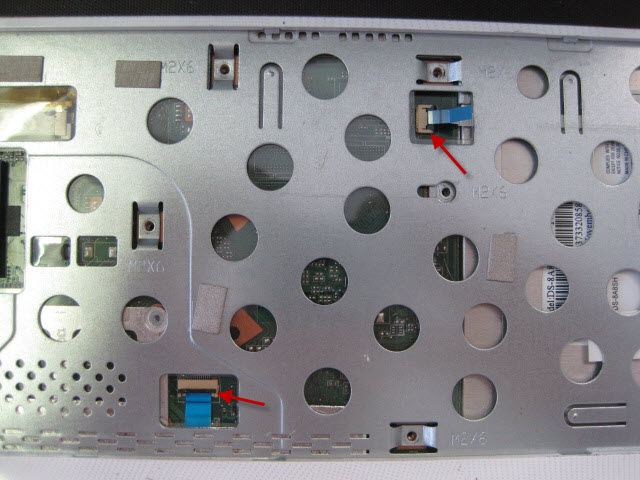
Detach the other two ribbons.
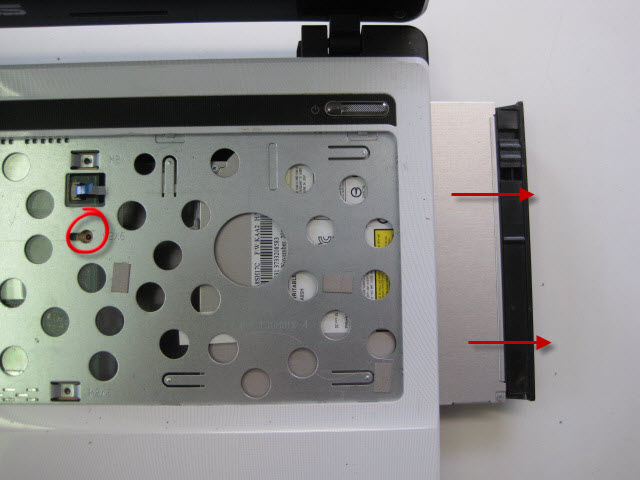
Remove the screw circled and remove the DVD drive as shown.
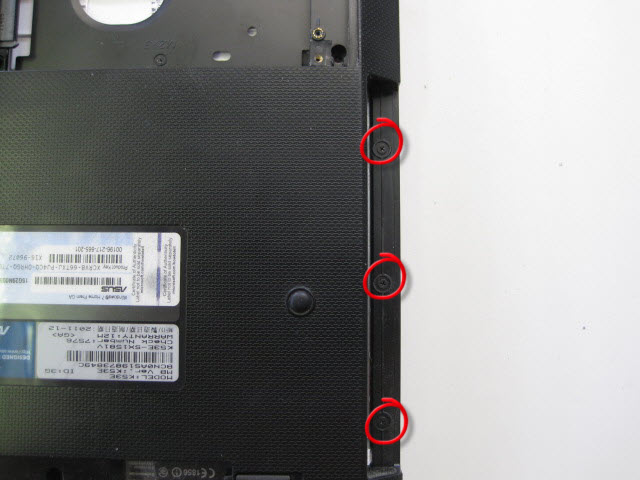
Turn the laptop over and undo the three screws in the top of the DVD bay.
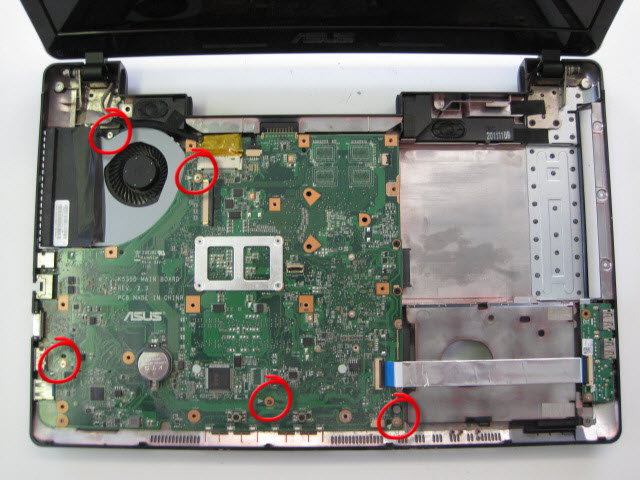
The top cover should now separate from the base revealing the motherboard below. Remove the screws circled. They are holding the motherboard in place. Note that one is different from the others.

Detach the ribbon from the motherboard by lifting the brown clip.

Gently pull the monitor and speaker cables out of the motherboard in the direction show. There are no retaining clips but there is tape holding the monitor cable in place.
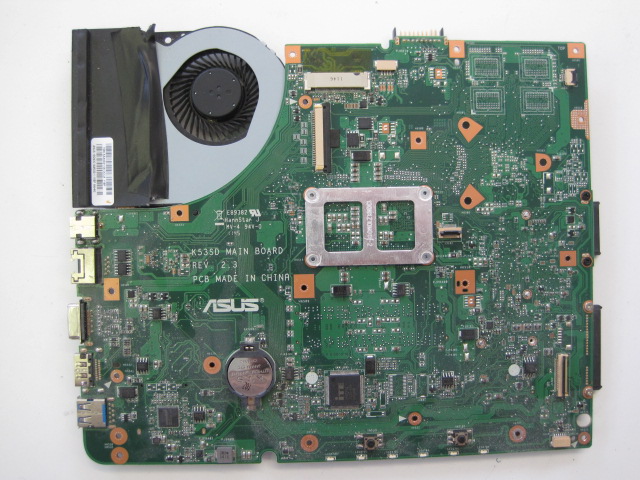
Top of the Asus K53E motherboard.
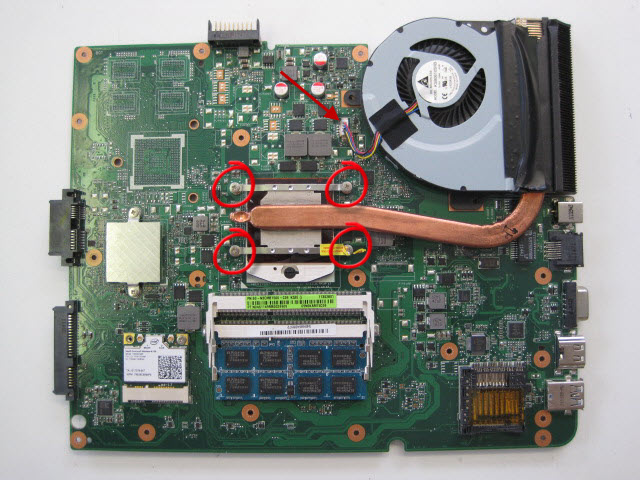
Remove the 4 screws securing the heat sink to the motherboard. Pull the power cables from the motherboard for the fan. Remove the heat sink and fan assembly.
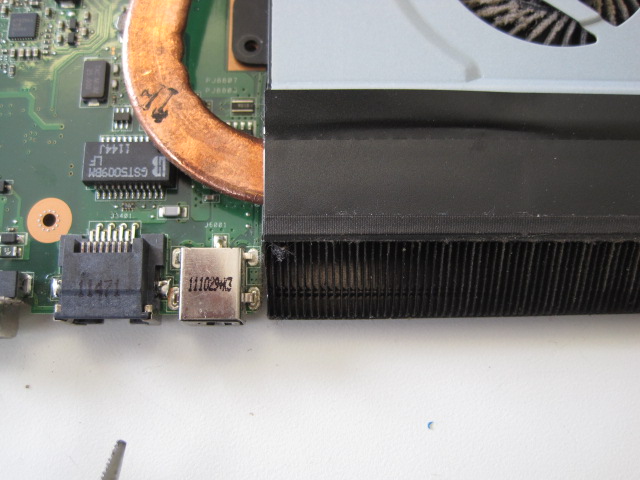
Note how close the heat exhaust is to the charger socket. If the exhaust is blocked the build up of heat will effect the charger socket possibly making the charger plug feel hot.
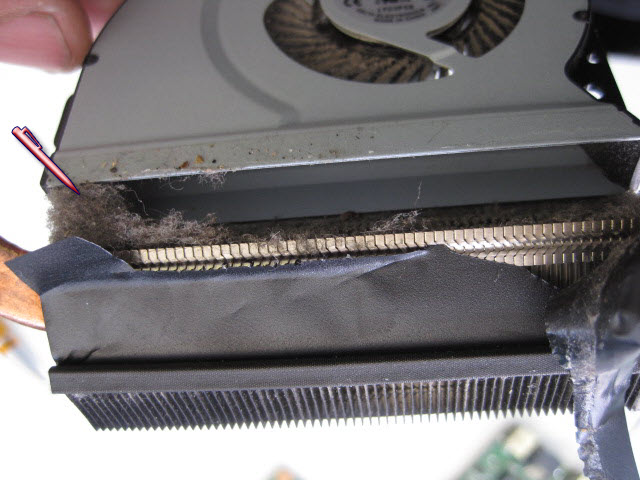
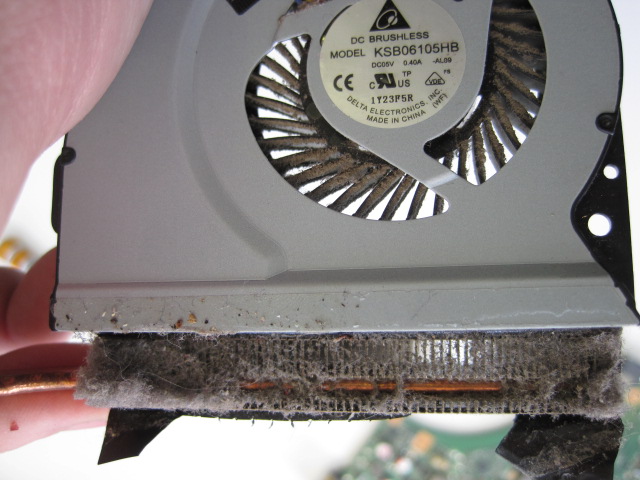
The fan is connected to the exhaust with tape. Remove the tape to see the dust build up.
Clean the visible dust and then undo the 4 screws holding the top cover to the fan.
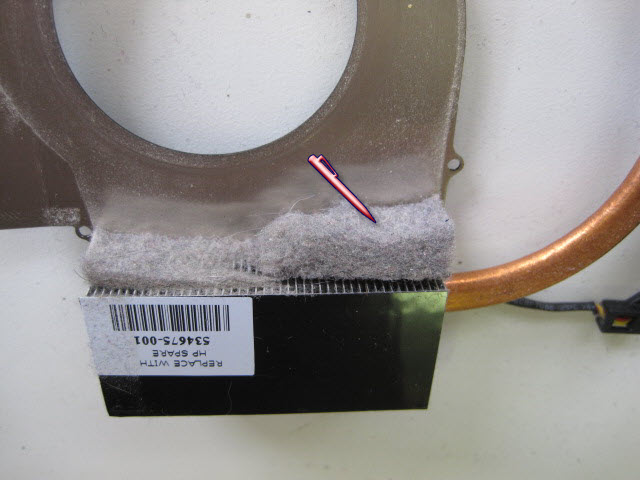
Remove the dust with a paint brush and vacuum cleaner.
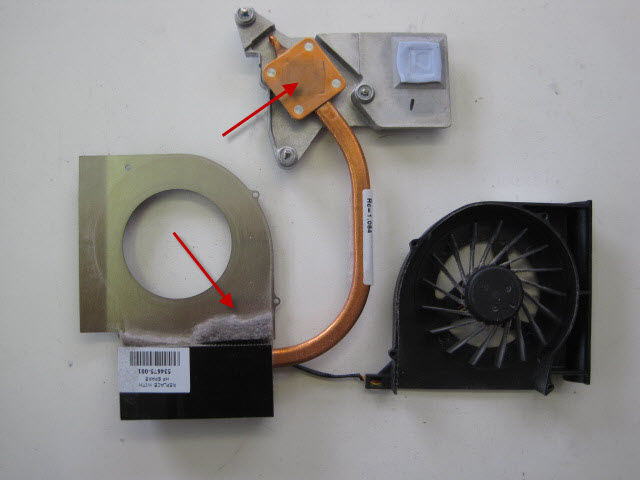
Clean the copper heat sink using a citrus based solvent.
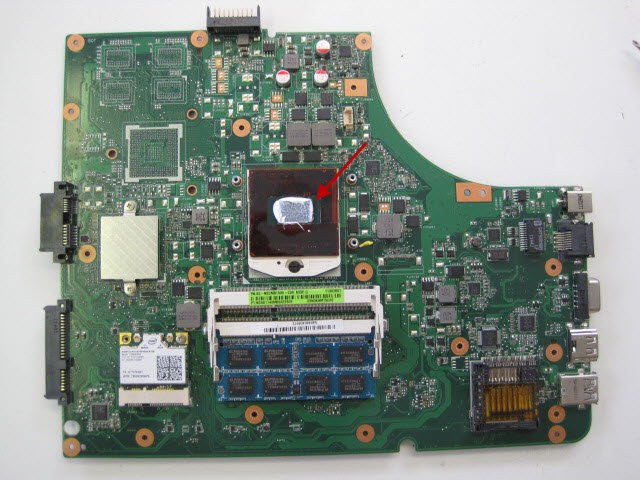
Clean the old thermal paste from the CPU. Apply new thermal paste and reassemble.
All the original photos are here. Please feel free to use them in your own work.