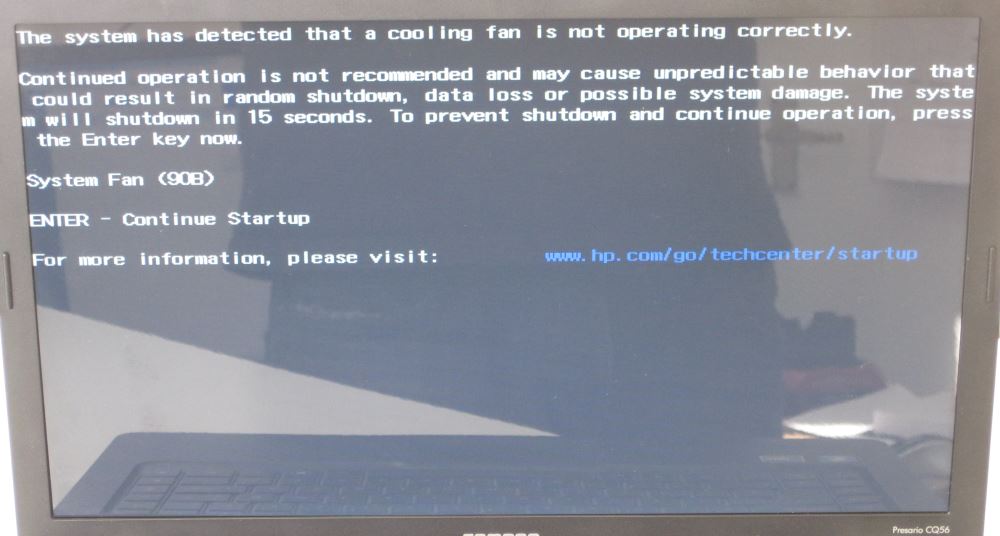
This article explains how to resolve a System Fan (90B) error from appearing when you start up your HP Compaq Presario Laptop. The laptop featured in this article is a CQ56. The full error reads:
The system detected that a cooling fan is not operating correctly
And looks like this:
The error is caused by the system cooling fan not spinning. Notice I said “Not spinning”. The most likely cause is that the fan is stuck or has fell off its spindle. Rarely are any new parts required for this fix but you will need thermal compound paste if you have to remove the heat sink from the processor (very likely).
In this example I have used a HP Compaq Presario CQ56 but this article is also applicable to many other laptop models as well as the CQ series from HP Compaq.
If you are very lucky you could poke a straightened paper clip through the holes for the fan and try and get the fan to start spinning. You do risk damaging the fan but it may be all that is required. More likely you are going to have to take the laptop apart which is described as follows:
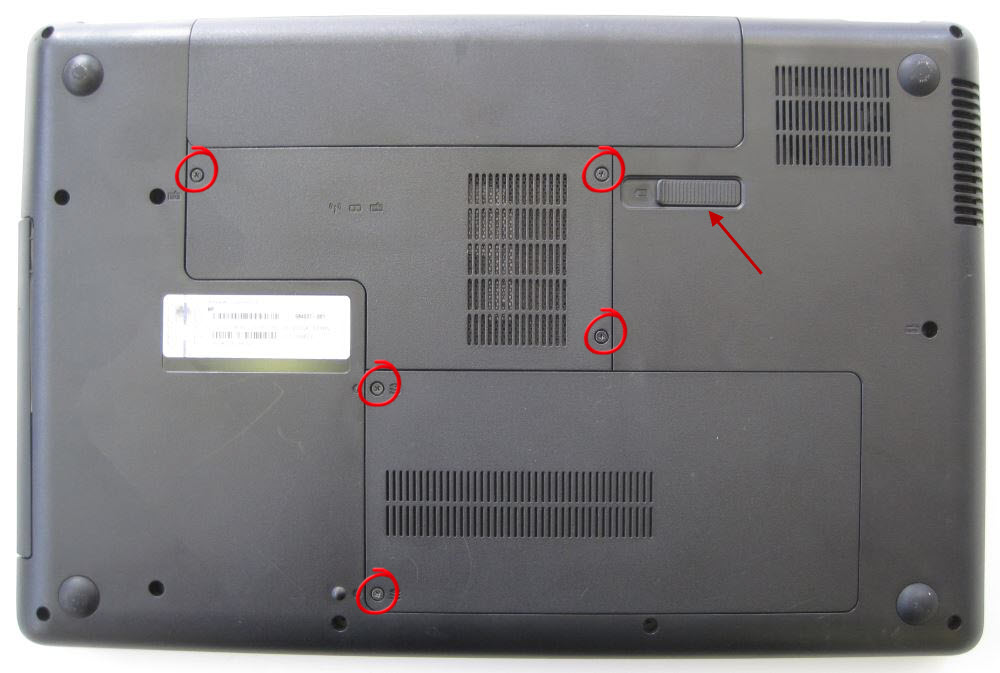
Remove the battery and the screws holding the hard drive and memory compartment panels in place and then remove the panels.
Once the panels are removed the laptop should looks something like this:
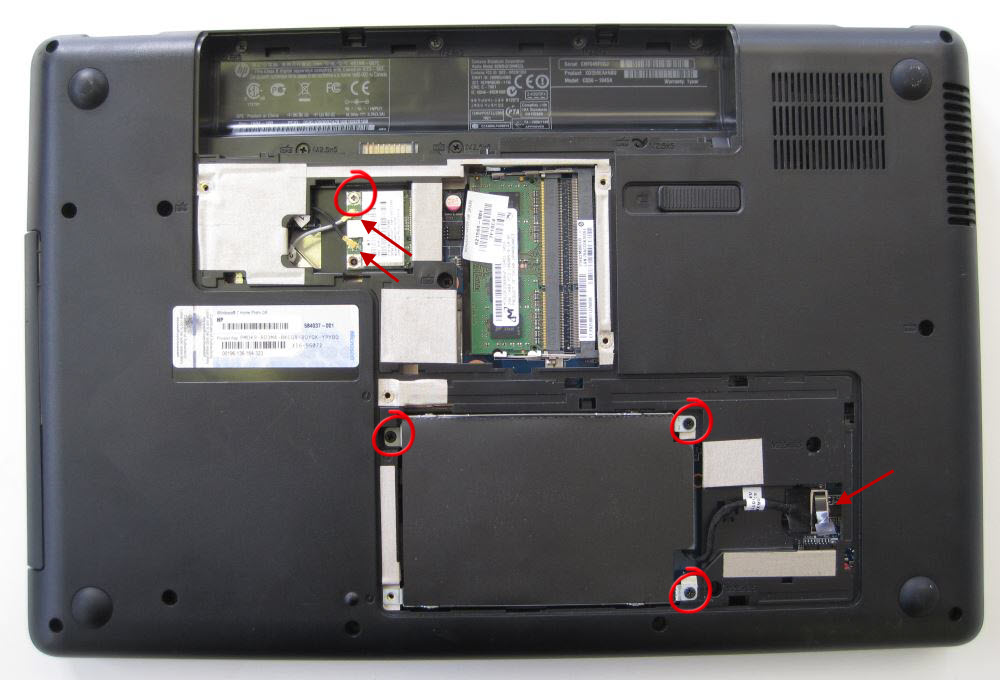
Pull the tab pointed to at the lower right of the picture above, this disconnects the hard drive from the motherboard. Then undo the three screws holding the hard drive in place. The hard drive will then lift out.
Also unclip the black and white wire from the wifi card pointed to by the two arrows on towards the middle of the photo, the undo the screw holding the wifi card in place. The wifi card should spring up allowing you to remove it from motherboard.
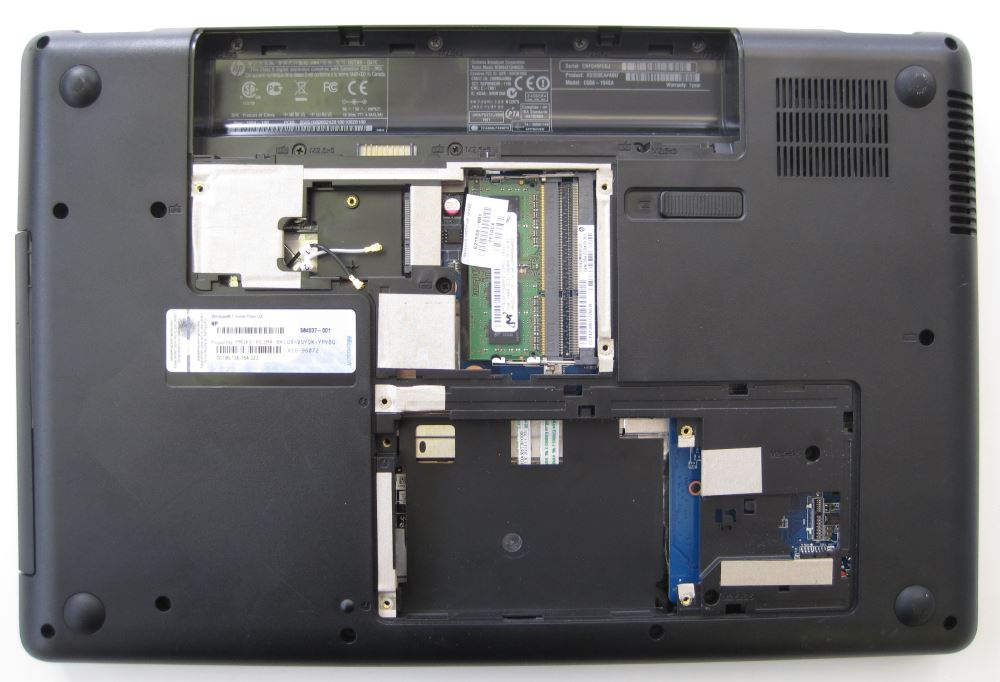
Note: You could remove the memory modules at this point if you want to. However, I leave them in so that I can test the basic functionality of the laptop before putting the whole thing back together once I think the fan is fixed.
Your laptop should now look like this:
Next remove all the screws holding the base to the top including the screws that hold the keyboard in. The screws are all circled in the photo below. Make a note of where the shorter screws come from. Also pull the DVD/CD Drive out from the left of the laptop.
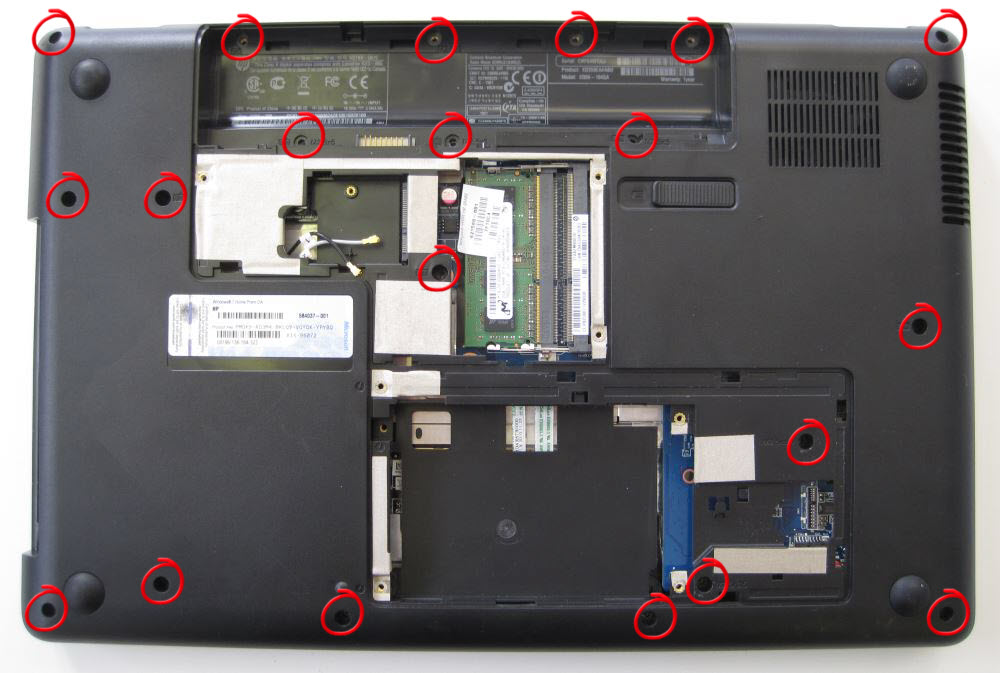
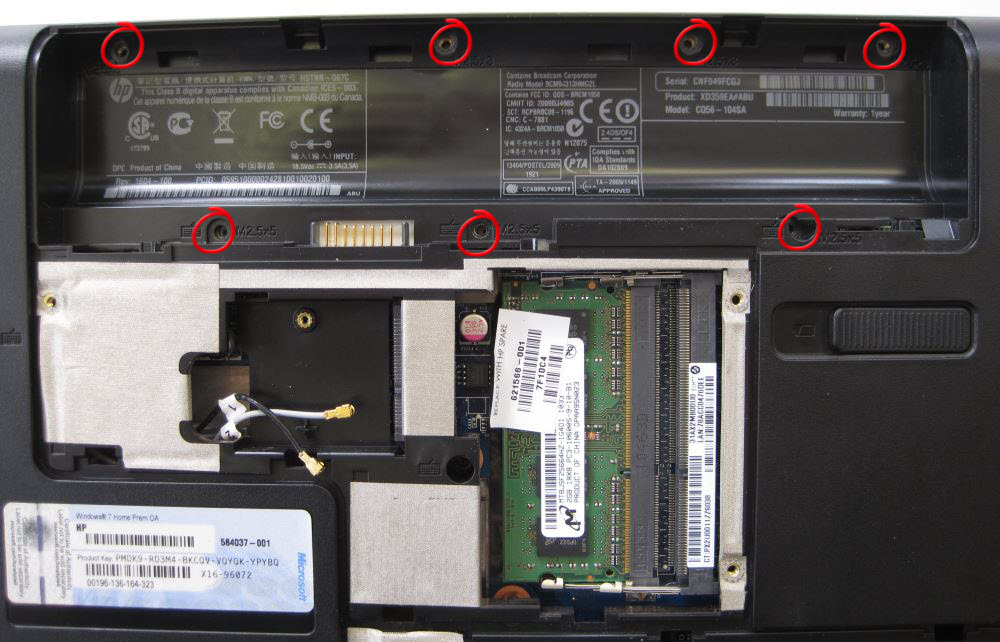
Make sure you get all 7 screws from within the battery compartment
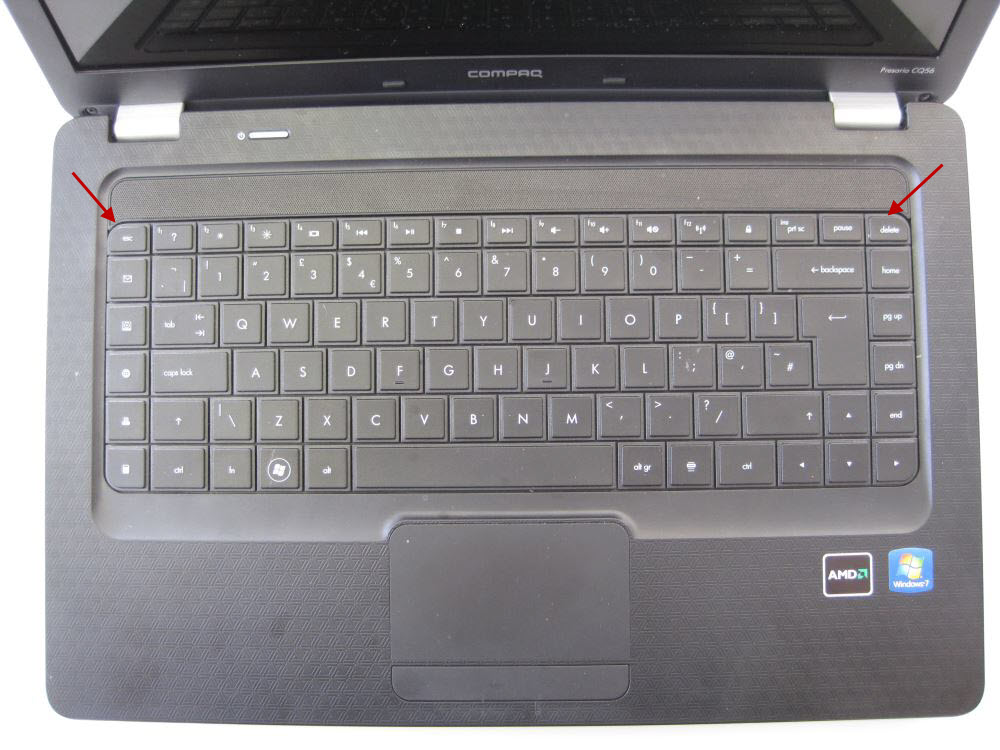
Next the keyboard needs removing. Using a sharp knife lift the keyboard starting at either of the points pointed to by the arrows and work to the other end.
 Be careful as there is a ribbon connecting the keyboard to the motherboard. To release the ribbon carefully lift the brown part of the connection and gently pull the ribbon out.
You should now have a laptop that looks like this:
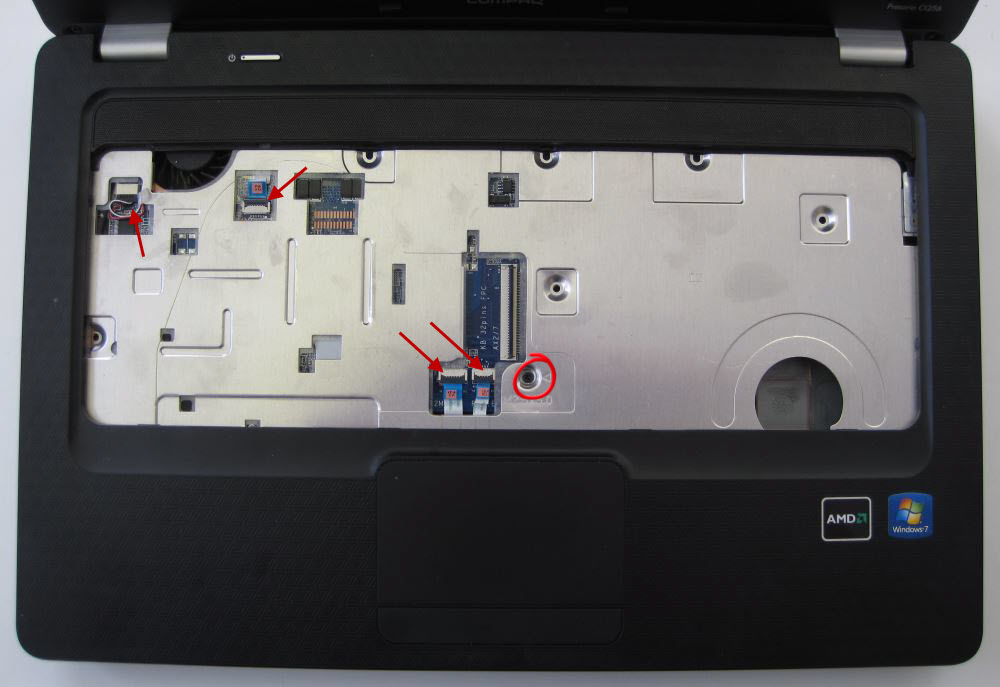 You need to undo the screw circled. Undo and remove the 3 ribbons and pull the speaker cable out of the motherboard (top right).
Now put the laptop onto its side so that the DVD/CD drive is easily accessible. Carefully separate the top of the base from the bottom as shown below:
Carefully work your way around the laptop so that it is open all the way round. The two parts should separate completely showing the motherboard.
Next you need to remove the wires connected to the motherboard and undo the screws holding the motherboard to the base.
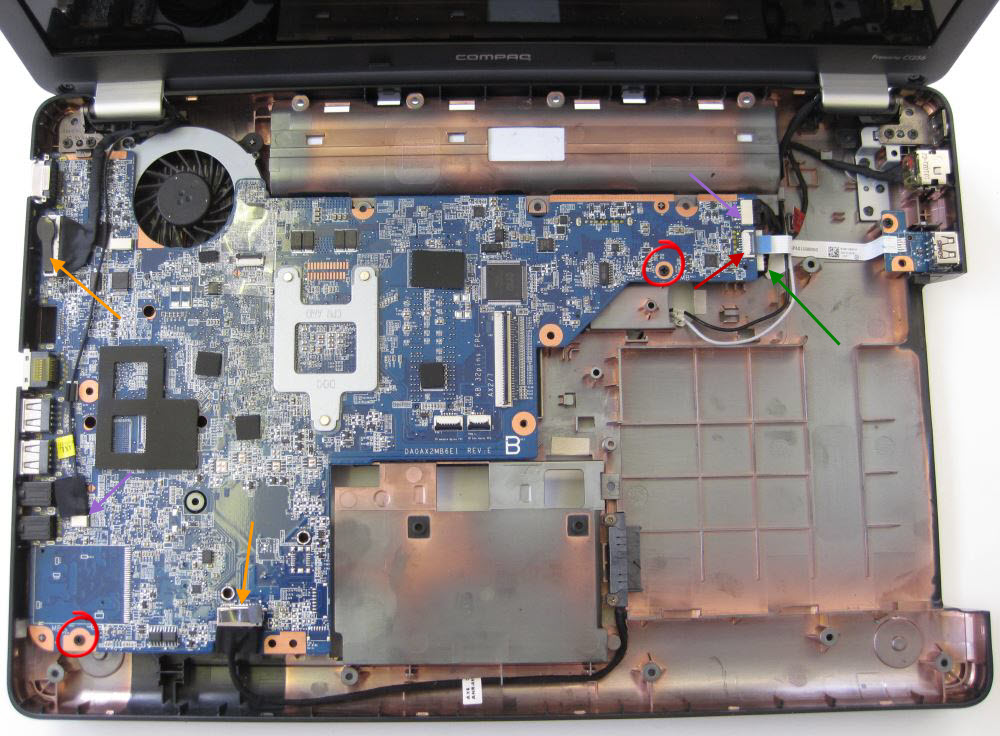
Undo the two screws circled. Then remove the ribbons by un-clipping the brown clips pointed to by the red arrow. Pull the tabs on the connectors pointed to by the orange arrows and gently pull the cables out of the sockets pointed to by the purple arrows. The motherboard is now ready to remove though the power connector pointed to by the green arrow is still connected.
Lift the motherboard from the right hand side slightly so that you can disconnect the power connector. Once removed the motherboard should lift out. Ne careful as there is a metal clip at the top left holding the motherboard in, you need to slide the motherboard down a little before completely lifting it out.
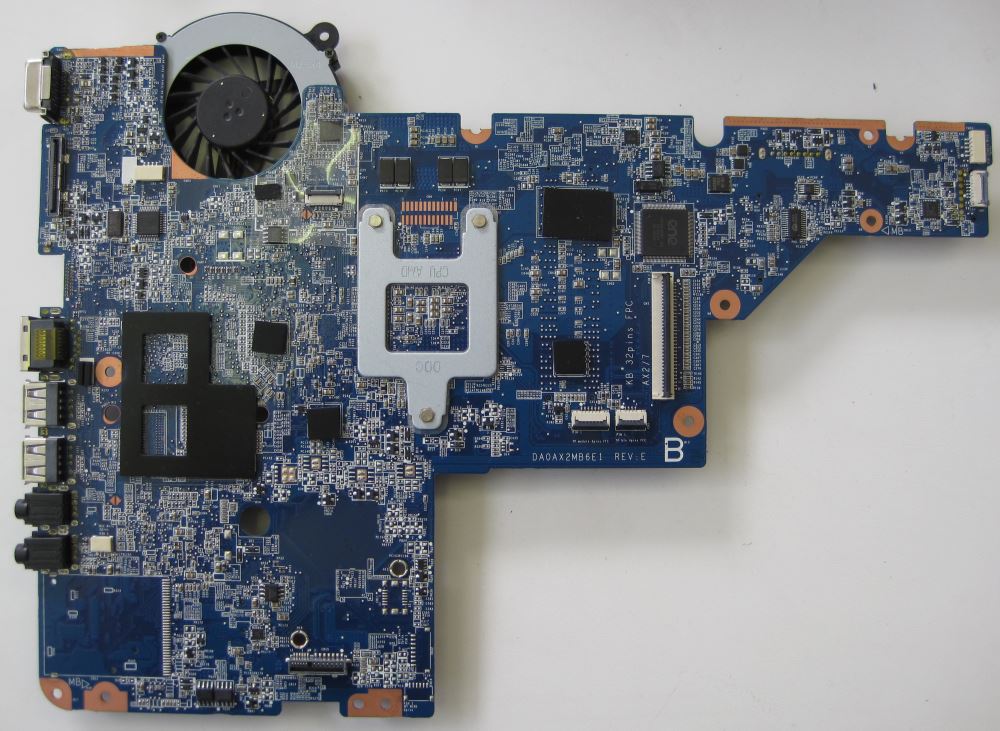
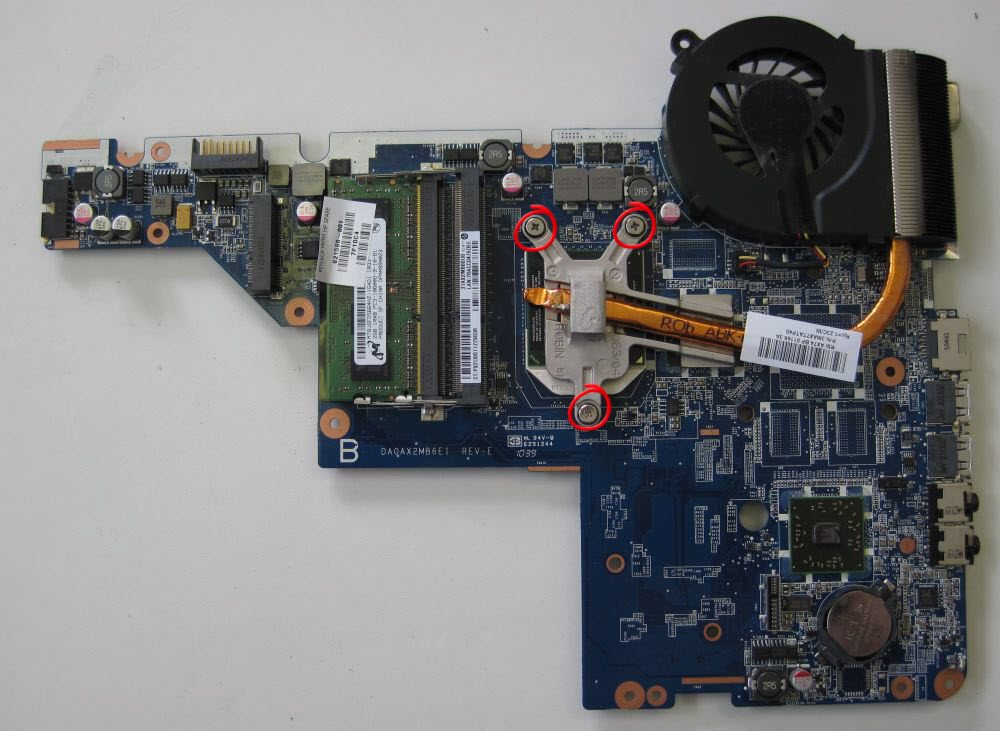
Turn the motherboard over to see the fan
At this point you may see that the fan is full of dust, has something stuck in it (in my case there was a screw loose in the fan). Try and move the fan, does it spin freely? If not try squeezing the top and the bottom of the fan housing, does the fan click into place? If it does then the fan had fell of its spindle. Clean the fan with a vacuum cleaner and a paint brush to remove dust.
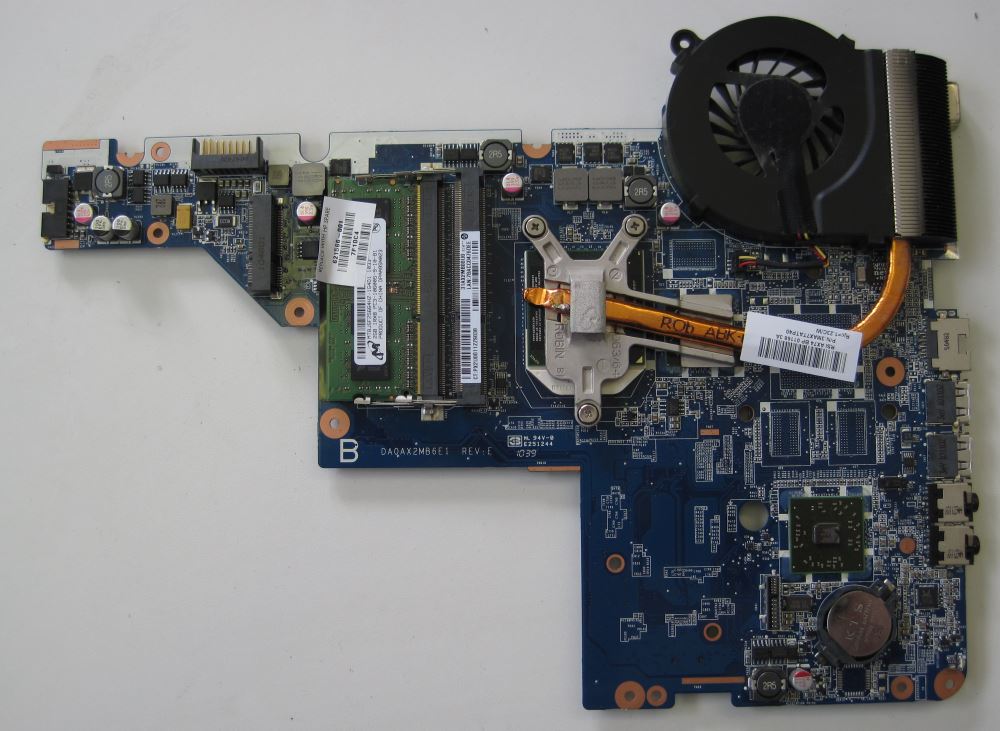
If you need to investigate further then undo the three screws securing the heat sink to the processor.
Note that if you do this then you are going to have to clean the processor and heat sink of thermal paste and then reapply thermal compound paste to the processor.
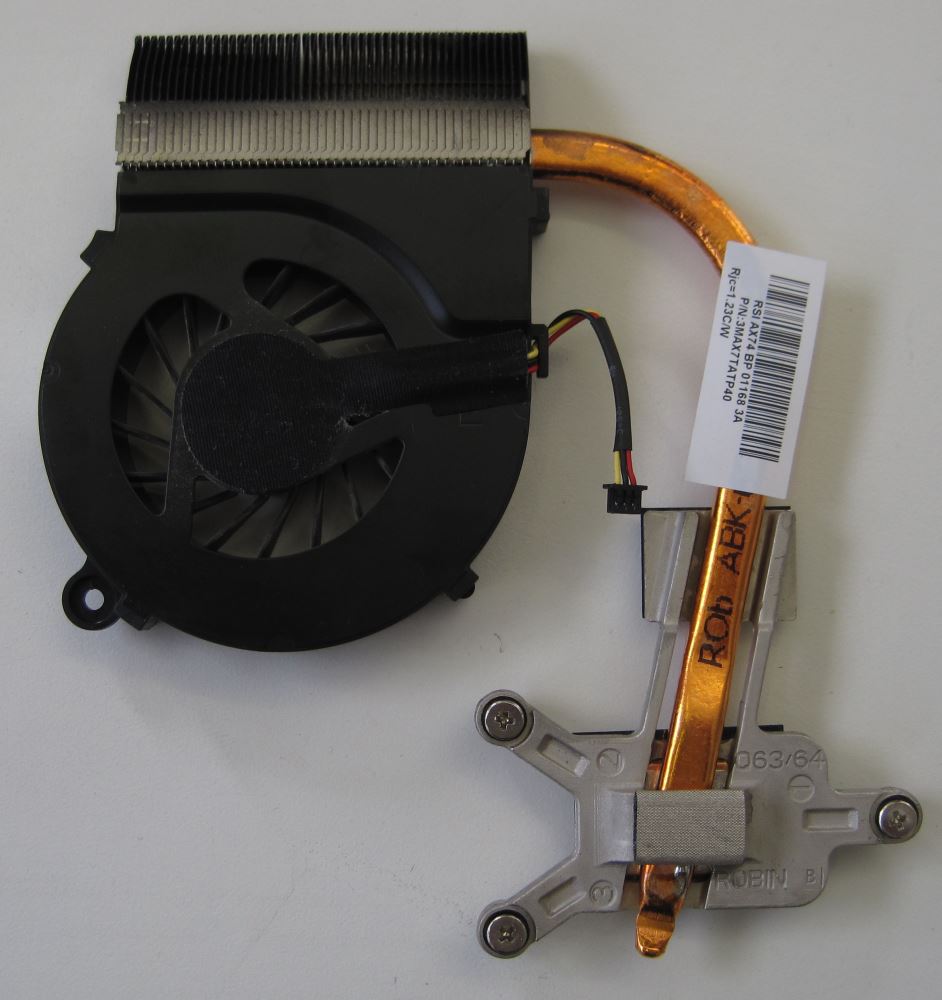
HP Compaq Presario CQ56 Heat sink and fan – top
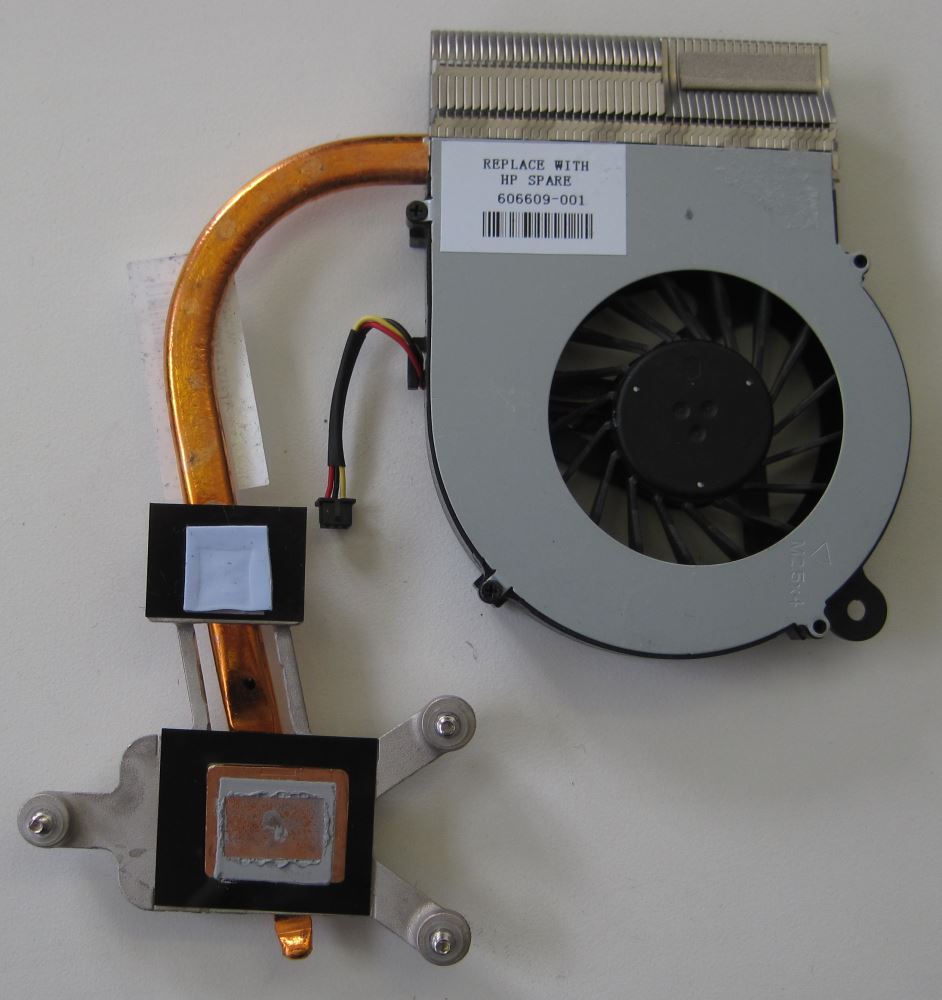
HP Compaq Presario CQ56 Heat sink and fan – bottom
If you want to test the fan then you need to apply a maximum of 5 volts to the red wire and use the black wire as neutral.
Providing the fan spins then reassemble in reverse.
Original pictures here -> HP Compaq Presario CQ56 photos